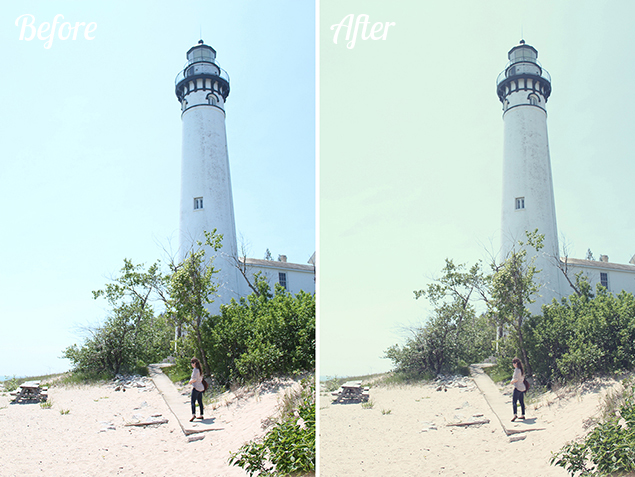
Photoshop Elements: Vintage Effect
Today I'll be showing you another tutorial from Adobe Photoshop Elements. Many of you know, I teamed up with them for the summer to be an ambassador. It's been a great experience so far and I've really enjoyed learning more about Elements and helping some of my readers learn too! I hope you enjoyed the last tutorial on creating collages and using clipping masks. Another question I frequently get is... how do you put your vintage effect on photos? There are several ways you can do this, but this is one of my favorite effects. It's more of a soft effect. I've tested it in several seasons and I love the way it makes a photo look - no matter the setting. Follow along to give your photos a vintage effect!

1. Choose your photo and open it in Adobe Photoshop Elements. Be sure you're editing in the "full" tab on the right hand side of your window. First, duplicate your layer. You can right-click on your layer and select "Duplicate Layer".

2. Create a "Hue/Saturation" layer. Click on the little half black/half white circle at the bottom to pull up your options, then click "Hue/Saturation...".

3. Change your Master Hue to a negative -35 in the Saturation section. Then change it to Reds and change your Hue to -3 and your Saturation to +11.

4. Next, we'll want to create a "Levels" layer. Click on the same half black/half white circle at the bottom of your layers pallet to pull up your options. Click on "Levels...".

5. In the Red category, change your middle slider to 1.24. In Green, change your middle slider to 1.20. In Blue, only change your output levels to 29 (255 should be default, but just check to make sure.)

6. Next, let's create a "Solid color" layer. Click on the same half black/half white circle at the bottom of your layers pallet. Select "Solid color...". It will pull up a window where you can select a color. Be sure to choose a blueish/purple color. You can use my RGB codes to use the same exact color, if you wish.

7. Once your solid color layer is created, go to the top of your layers pallet and click the pull down menu where it says "Normal". Change it to Exclusion.

8. Then, set your Exclusion layer to an opacity of 50%.

9. Personally, I felt like this effect was a bit too strong for my photos. So, I wanted to tone the entire effect down a bit. I grabbed all of my layers that I edited: my background copy and all of my adjustment layers. Then I right-clicked, and selected "Merge Layers". This will create a flattened layer of your vintage effect.

10. Change your new flattened layer to an opacity of 50%. This will tone down your effect by 50%. If you want to keep a stronger effect, use anything above 50%. If you want to weaken the tone a bit, go below 50%.

There you go - an easy 10 step process to putting a vintage effect on your photos! Here are a few examples of how it will look in different lighting. This first photo was taken in autumn sunlight. The second photo is a detail shot of flowers in spring. I love seeing how different, but yet unique they both look. Enjoy and be sure to let me know if you have any questions!


